I didn’t think it would be easy to make a stick eraser, and I definitely didn’t think it would work well. Turns out I was completely wrong in both regards. This post is all about how to make a stick eraser!
This post may contain affiliate links, which means we’ll receive a commission if you purchase through my link, at no extra cost to you. Full disclosure here.
To make a stick eraser you need any type of regular eraser, some kitchen towel and an empty pen. It works by inserting a strip of the eraser into tip of the empty pen, and supporting it by inserting a twisted sheet of kitchen towel into the pen.
Note: Adult supervision is needed for this project as a craft knife/sharp knife is being used.
At the bottom of this post, I’ve posted a short video demonstrating all the steps.
Just like our recent post about how to make your own kneaded eraser, this one is a blast to try out!
Materials list:
- An old eraser (preferably a block eraser)
- An old pen with a twist-on cap
- A craft knife/sharp knife
- A sheet of kitchen towel
1: Take apart the pen
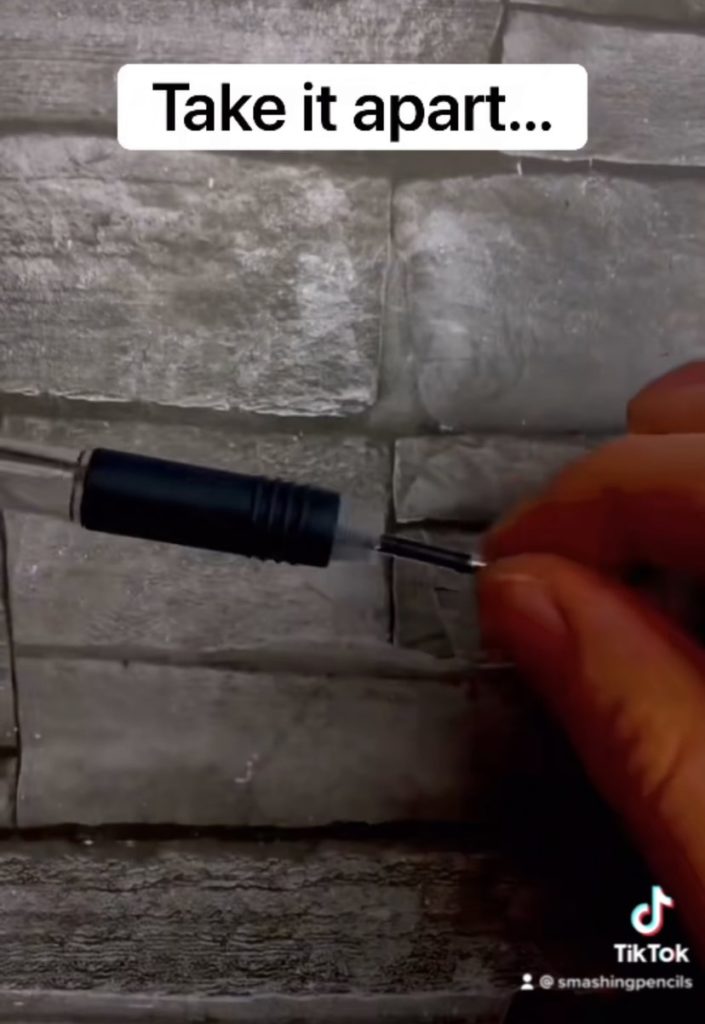
- Twist off the cap.
- Remove the ink cartridge.
- Pull the end off. Sometimes it just requires a good pull. If you can’t get yours off, you’ll have to find a different pen.
2: Cut your old eraser into rectangular strips
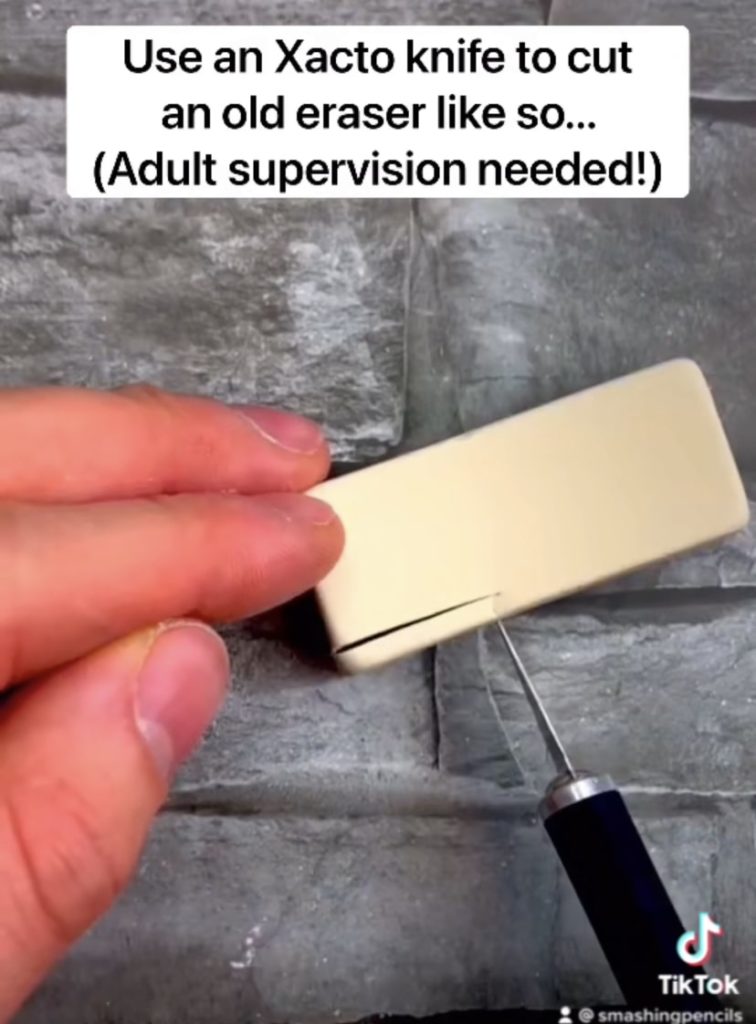
- It’s best to use a block eraser for this as it will be easier to cut equal strips (but any eraser will work with some effort).
- Cut off one side of the eraser a bit less than an inch long, and about as wide as the hole of your pen (but slightly thicker).
- Then cut that piece into a number of other strips, each one approximately as wide as it is thick (in other words, a square shaped cross section. See second image above).
- You only need one strip for now, but it’s good to save some for future refills!
3: Fit the eraser-strips into the cap
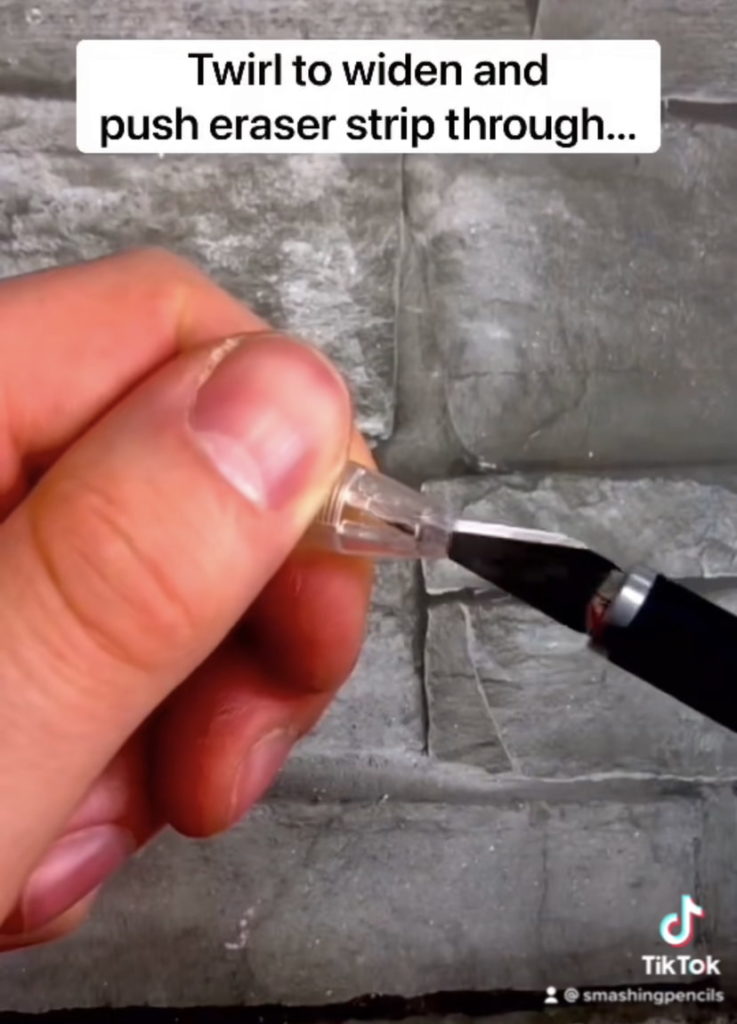
- Check to see if your eraser-strips fit into the hole of the cap, and if not widen it by twirling you craft knife gently inside the hole. Be sure not to push towards your hand, and only twirl in circles!
- Once it’s the right size for a tight fit, push one of your eraser strips through.
- You want to leave the strip poking out about the length of the tip of a normal pencil.
4: Twist a tissue sheet
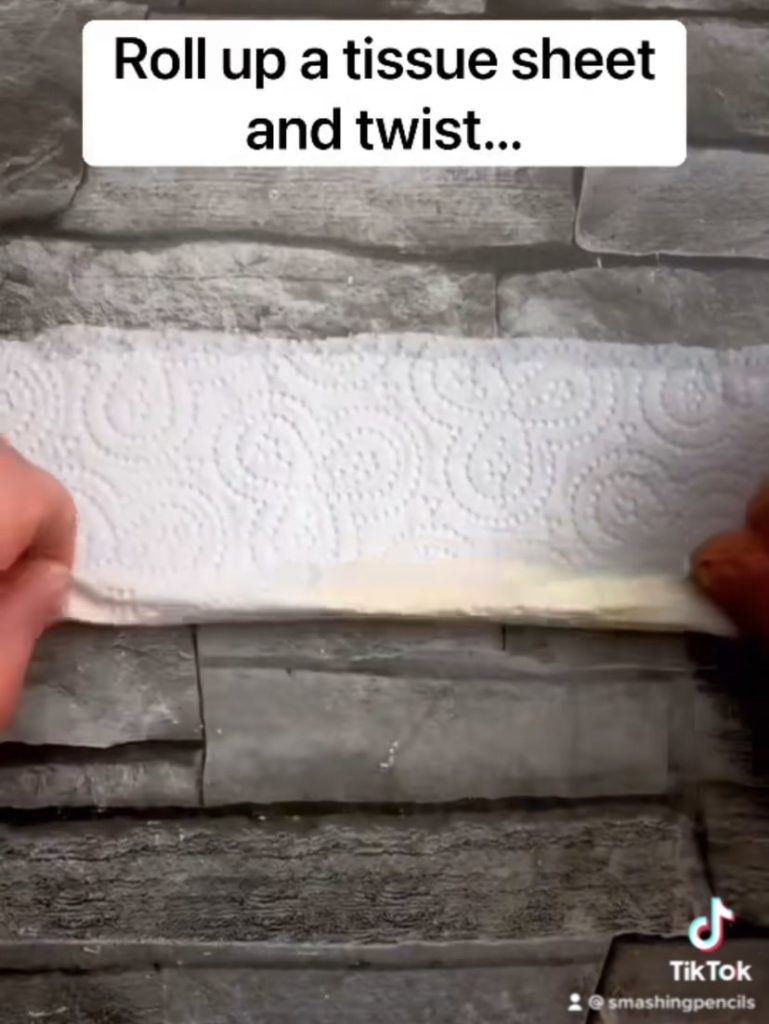
- Get a sheet of kitchen towel and roll it up tightly. Make sure it’s very tight, because it needs to support the eraser from falling into the pen.
- Twist the rolled up sheet of kitchen towel as tight as you can. This really helps improve the strength of it.
5: Insert the sheet snugly into the pen and cut the excess
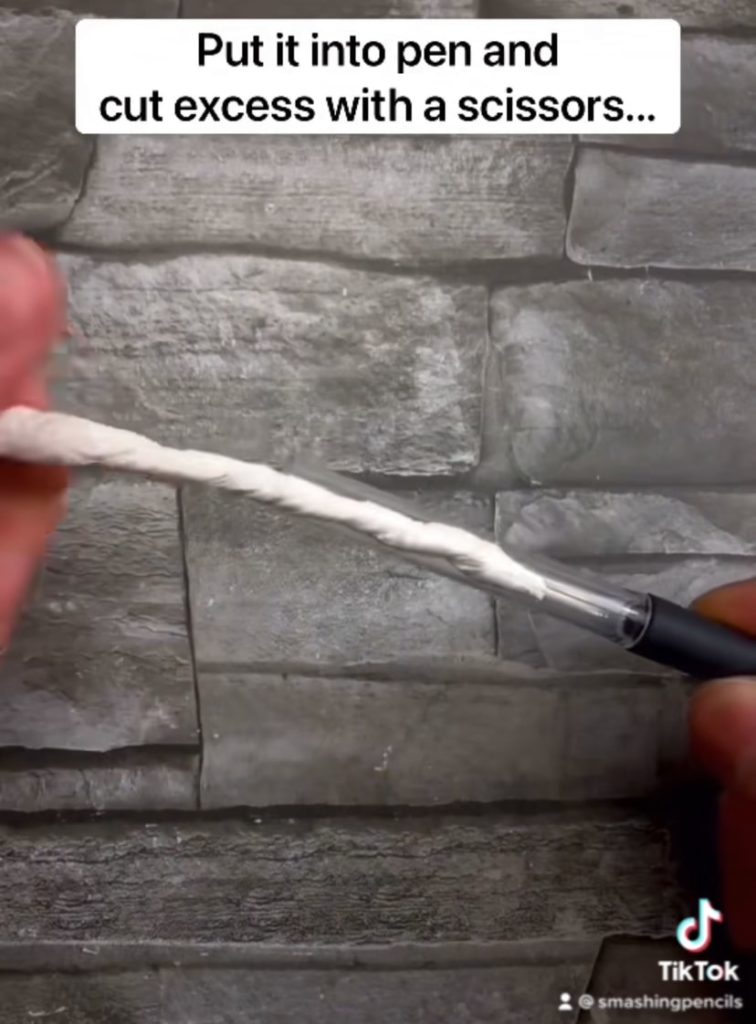
- Insert your twisted sheet of kitchen towel into your empty pen, all the way down to the end of it.
- Once it’s in all the way, cut off any excess hanging out the end with a scissors.
6: Reassemble the pen
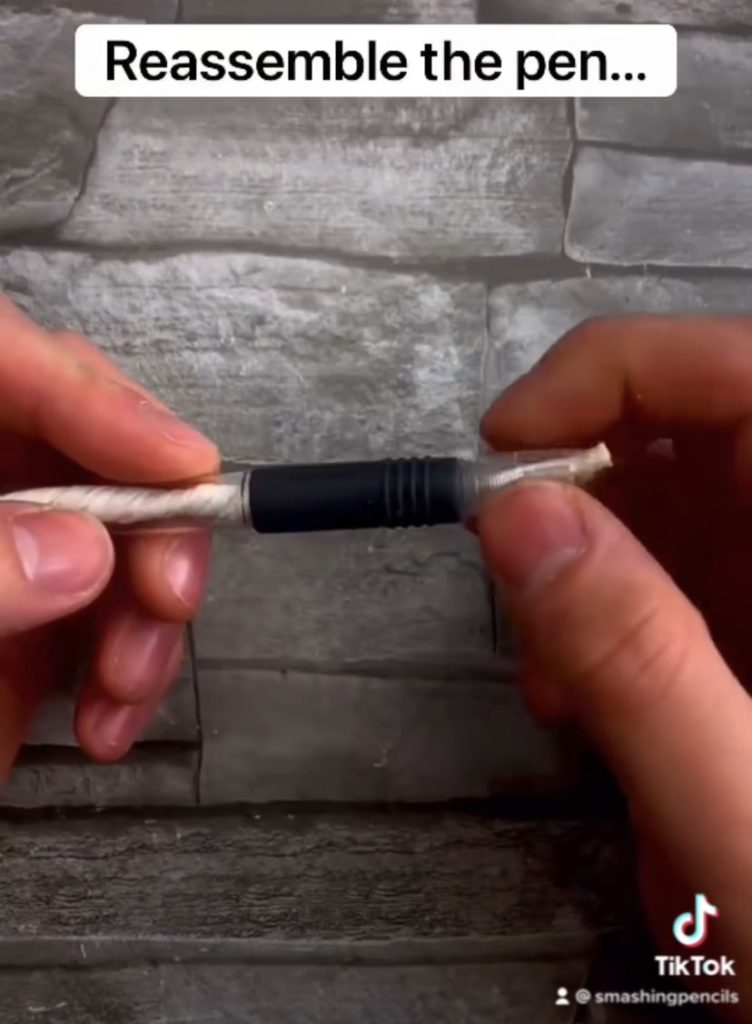
- Now all you need to do is replace the cap and end piece!
- Again, you need to make sure the kitchen towel is firmly pressing against the eraser. If not, it will just get pushed into the pen as you erase!
- This can also happen if your eraser-strip is too thin. In either case, you can go back to the relevant step and try again with a new sheet of kitchen towel and/or a thicker strip of eraser!
And you're done!
This is one of those hacks that’s surprisingly easy to do, but also one that works really well. And it’s genuinely useful.
If you’re in a pinch, it works almost as well as a regular stick eraser. Obviously it won’t be quite as good, but it’s definitely useful if you’re stuck or want to try a stick eraser out!
For lots more art tips, check out our other posts, and subscribe to our email list at the top of the page to be notified when brand new posts are uploaded and for a chance to be drawn!


