This post may contain affiliate links, which means we’ll receive a commission if you purchase through my link, at no extra cost to you. Full disclosure here.
The difference between core shadows and cast shadows is important to think about and is rarely pointed out or explained. This article explains the cause of shadow areas on a subject, the difference between core and cast shadows, and an explanation of how to draw them.
The difference between core shadows and cast shadows is that core shadows are the darkest part of a shadowed region on a subject, whereas cast shadows are shadows that are cast by one object onto a different object. The silhouette you see of yourself on a sunny day is a cast shadow of yourself.
Core Shadows vs. Cast Shadows
The cause of shadow areas on an object
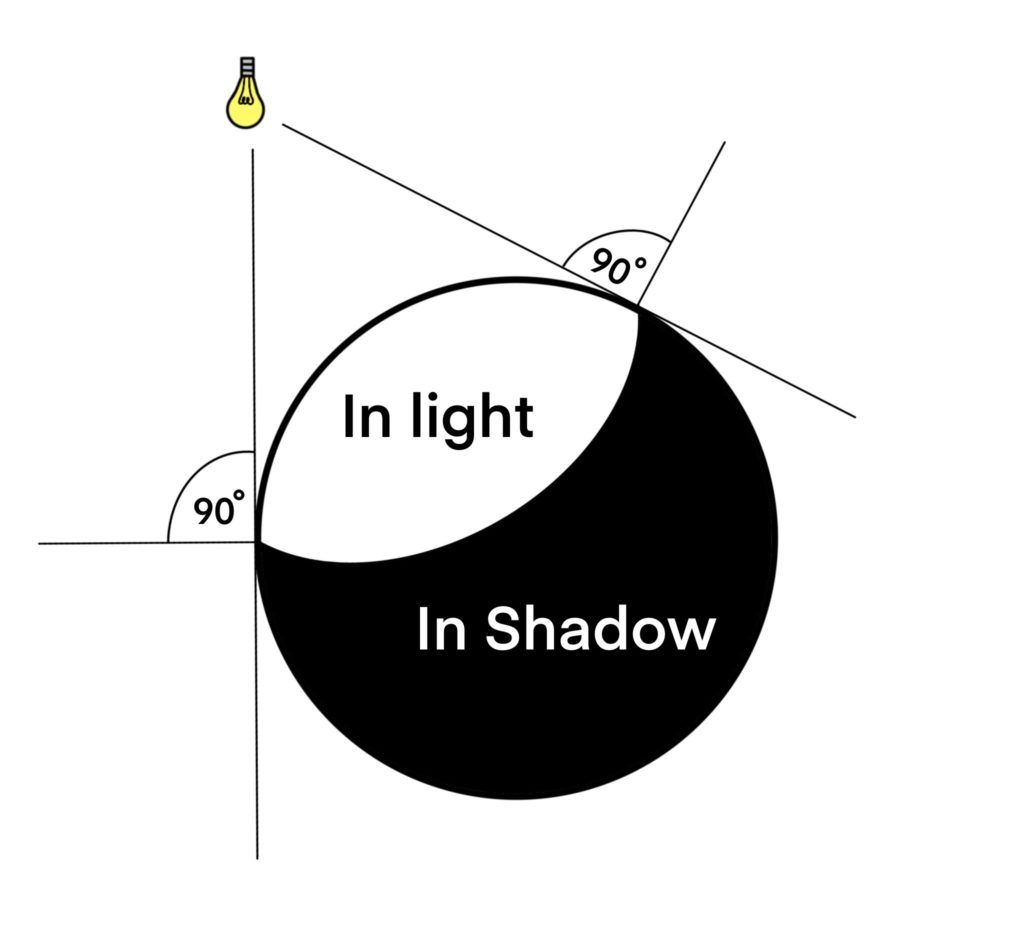
There are two types of shadows: shadows on the object you are drawing, caused by the angles of the planes facing away from the light source; and shadows cast by the object onto the ground, or onto another object.
The shadows on a face, for example, are the areas of the face that are not facing the light. Another way of saying this is that any region/plane that is facing more than 90 degrees away from the direction of the light source is in shadow.
This type of shadow is the result of the region not being directly hit by a light source.
What is reflected light?
You might think that if a region isn’t being hit by a light source then surely it should be all the same black color, right?
This isn’t the case because of one thing: reflected light.
Reflected light is all over the place. Light bounces off nearly all objects, but the objects absorb a lot of the light, making the reflected light much weaker than the primary light source. In fact, anything that receives light becomes a weaker type of light source itself.
Think of a reflection on a nose, for example. Light hits it, and now the nose now is reflecting that light outward, acting as an additional light source. The reflectivity of the object determines how strong or weak it will be as a light source (mirrors would be stronger than a matte, black table).
These secondary light sources, however, regardless of their reflectivity, can never be as strong as the light source from which they are receiving light.
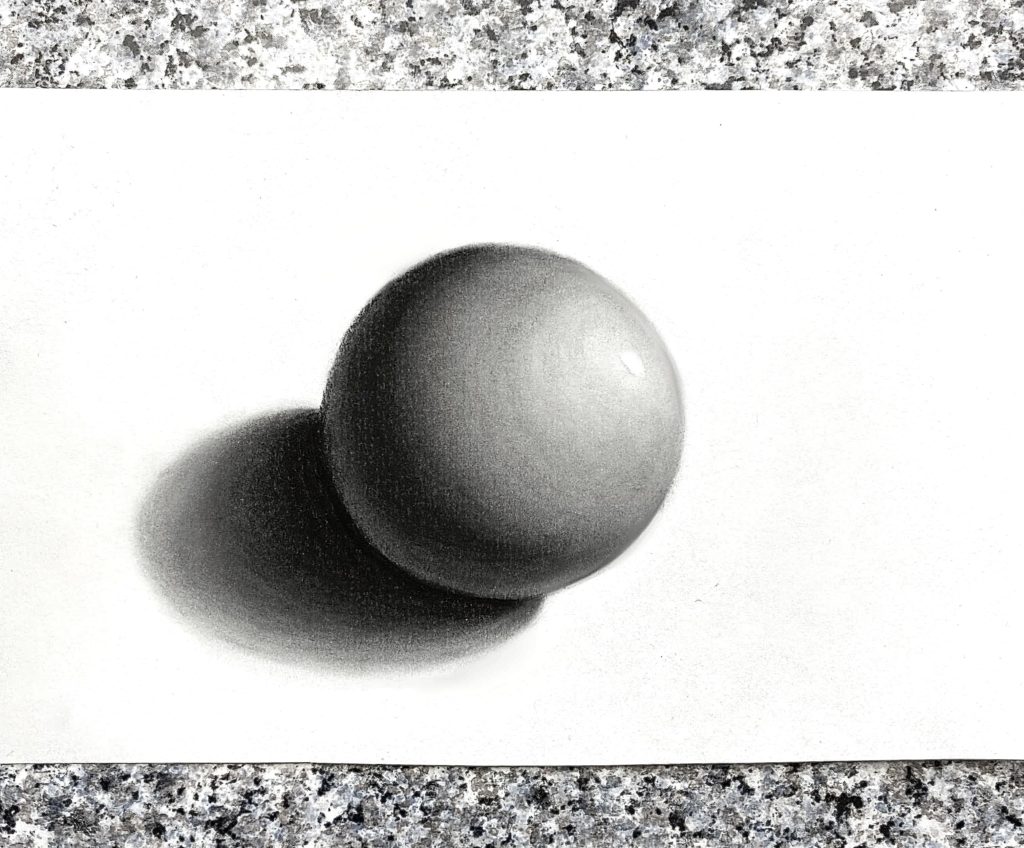
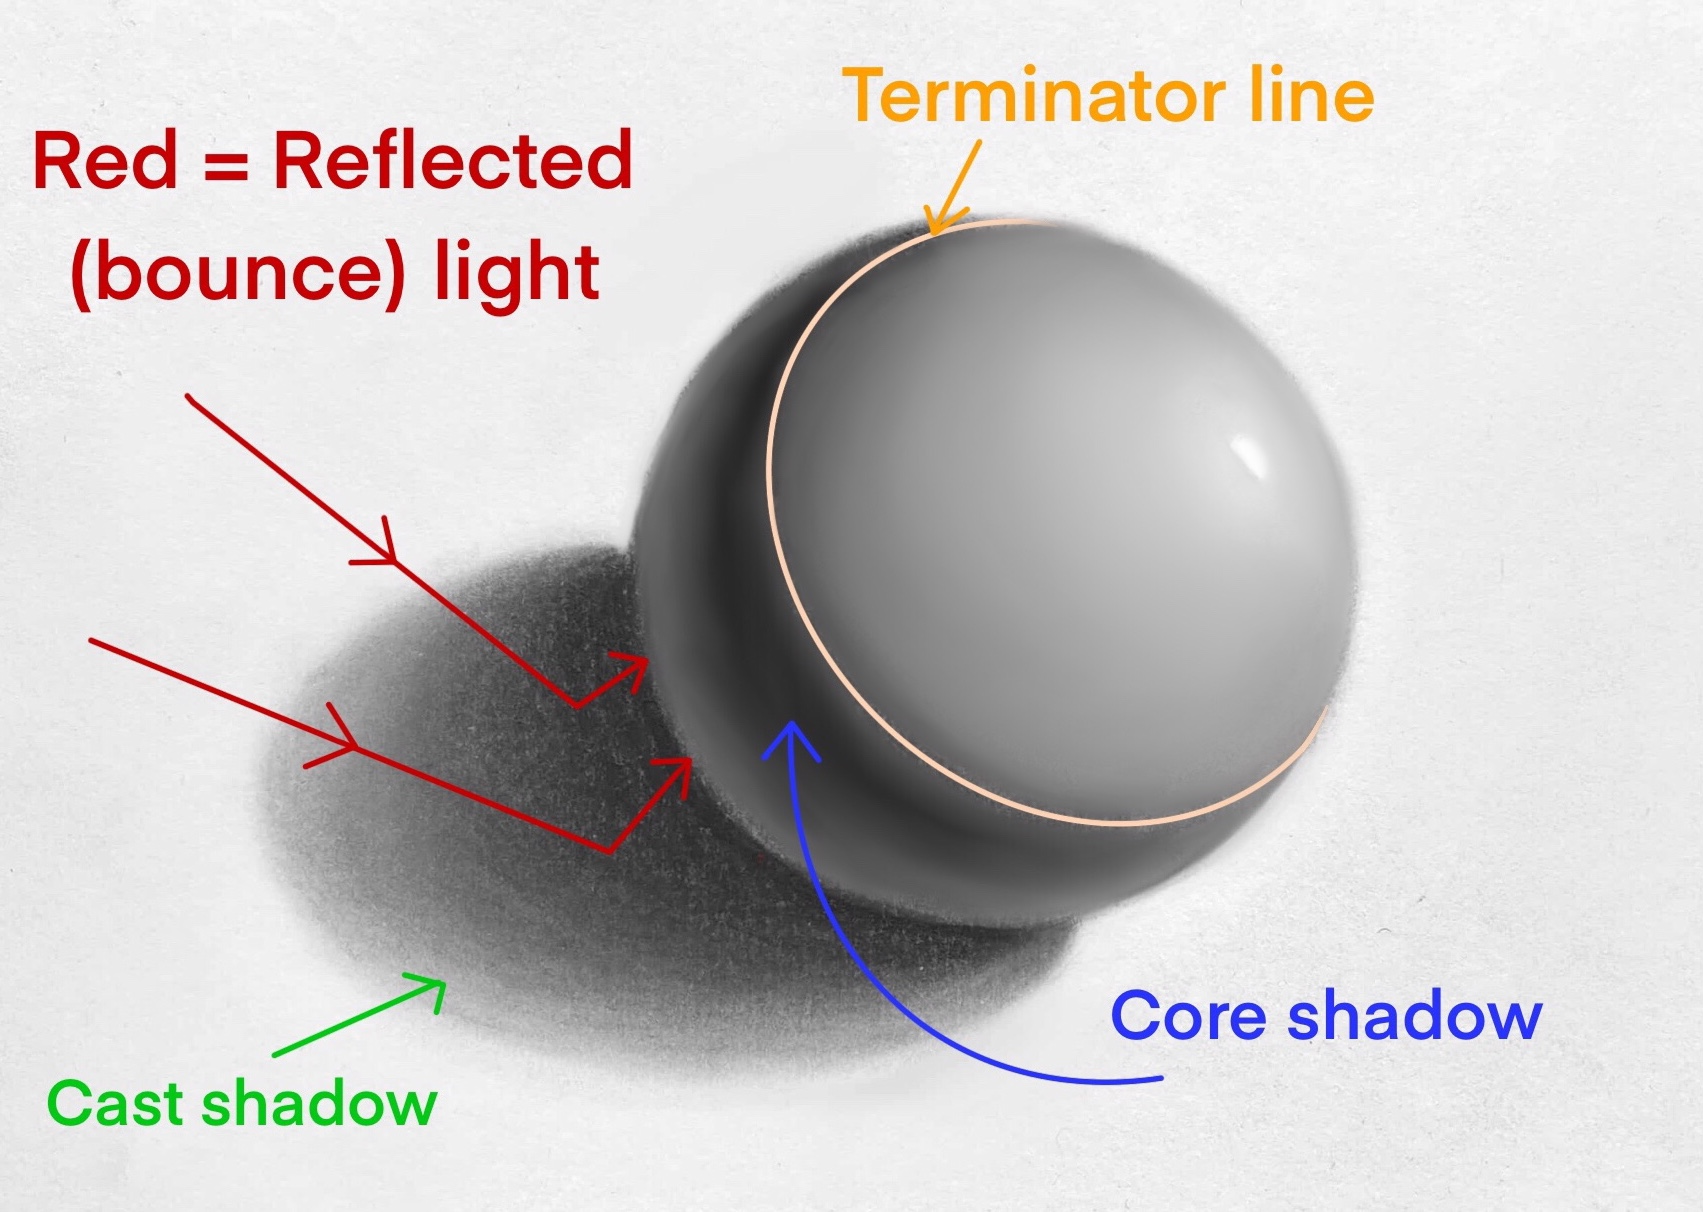
So, all of these weaker reflected light acts as secondary light sources, and this is what lights up parts of the shadow regions. If you observe a sphere resting on a table, for example, with a light source shining at an angle above, you’ll see the shadowed side is lightened slightly in the region closer to the table. This is because reflected light bounces from the table and lights up part of the shadow.
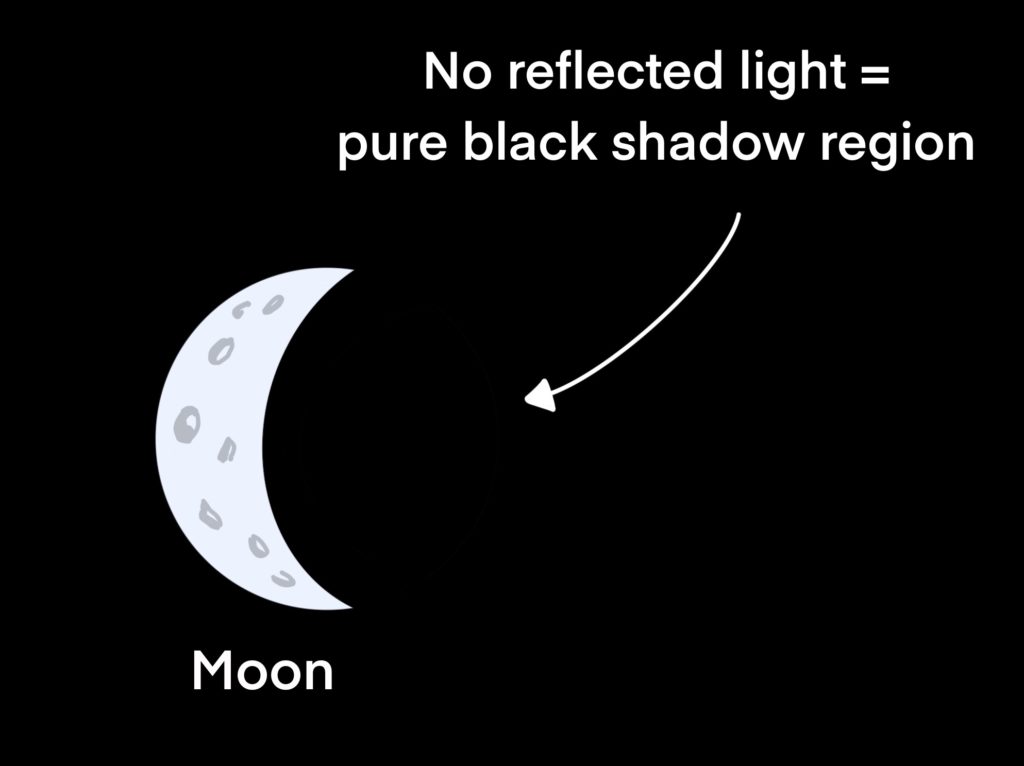
But what if there was nothing for the light to bounce off? Surely then the shadowed region would be a solid black, right? Yes! A perfect example of this is our very own moon. Take a look at the moon any time it isn’t full and you’ll see the shadowed part is pure black, because, in space, there’s nothing for the light to bounce off to light up the shadowed side. How cool is that?
What is a core shadow?
The core shadow is simply the region of the area in shadow that is the darkest. It is the darkest because it receives less reflected light than anywhere else in the shadowed region.
Why? Because it happens to be in the position that is facing the most away from the primary light source, as well as the reflected light sources. It’s because of this reason the core shadow nearly always lies just after the terminator.
Is the terminator the same as the core shadow?
The terminator and core shadow are not the same things. The terminator is the line where light turns to shadow. This is where the planes of the subject are facing exactly 90 degrees away from the light source. In other words, the terminator is the line representing the parts of the object where the light no longer hits its planes.
The difference between core shadows and cast shadows

Cast shadows, unlike core shadows, are caused by an object blocking out the rays of light coming from a light source. This gives the illusion that a shadow is being “cast”. When you see a silhouette of yourself on a sunny day, for example, that’s a cast shadow.
In drawing, you should be aware of any cast shadows are cast onto the subject itself.
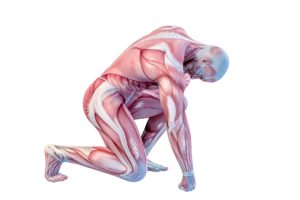
Take a figure drawing for example. Part of the model could be covered by a shadow cast from the model’s own arm, leg, etc. These can be quite difficult to convey well in a drawing without having them look like just a black patch on the model, so make sure to keep the light source constantly in mind and draw all shadows consistently with it to create a convincing figure.
Fun thought: In reality, the cast shadow isn’t being “cast” at all. Everything is naturally in shadow when you think about it. So the cast shadow is just the part that happens to not be lit up by any light source, because of the light being blocked by some other object!
How to draw core shadows
To draw core shadows, shade the entire shadowed region, giving it a dark value, but not fully black. Look to the area of reflected light in the shadowed region – this is the tone you need to aim for. Once shaded evenly, add the darker core shadow, while keeping the reflected light in mind.
Many beginners shade the entire shadowed region very dark and then use an eraser to lift off the lighter areas, where the reflected light has lightened. This method is awkward and inconsistent – it is far easier to shade the entire region the same tone as the reflected light first, and then add the dark, core shadow. This is much easier and gives you far more control.
Then you can smoothen out the core shadow so that it gradually transitions into the rest of the shadow.
The size and shape of the core shadow greatly depend on the shape of the object. It’s nearly always right past the terminator. Observe your subject and the surfaces surrounding it that are acting as light sources and draw the core shadow with this in mind.
How to draw cast shadows

To draw cast shadows correctly, some knowledge of perspective is required. My favorite book for beginners on perspective is “Perspective Made Easy” by Ernest R. Norling. For a more advanced look into perspective, “How to Draw” by Scott Robertson is fantastic.
So, assuming you have some perspective knowledge, find the position of the cast shadow by identifying the horizon and position of the light source. Then draw a vertical line from the light source until it hits the horizon. We call this new point the shadow vanishing point.
Draw lines from the light source through the top corners of the object (you can draw a cube around complex objects to simplify this process). Then draw lines from the shadow vanishing point through the bottom corners. The point of intersection between each top and bottom line is the location of the top corner of the cast shadow.
Once you locate all of the points, connect them to get the cast shadow shape. This is more easily visualized in the diagram.
A step-by-step tutorial of shading a sphere
If you want a step-by-step tutorial on how to draw and shade the sphere below, check out our post here.
That pretty much sums everything up!
Subscribe to our newsletter at the top of the page if you’re new around here! Happy drawing!